
How to upload Items for selling on DesignerGraphy?
Today! I will guide you to uplaoda your file for selling on DesignerGraphy. You can make extra income with DesignerGraphy. Te question is How? If you are a professional Graphic Designer and you are master any of these tools like CorelDraw, Photoshop or Adobe Illustrator then you can have some extra income just by selling your good creations. DesignerGraphy allows you to sell your original contents, the good quality contents and let you make some extra income. You will level up your income as you keep uploading and selling. So, what are you waiting for? Reqister on DesignerGraphy and Become An Author to start selling.
Here I will guide you on Uploading your New content.
Step 1
Login to your Author Dashboard and your Dashboard will like this below image.

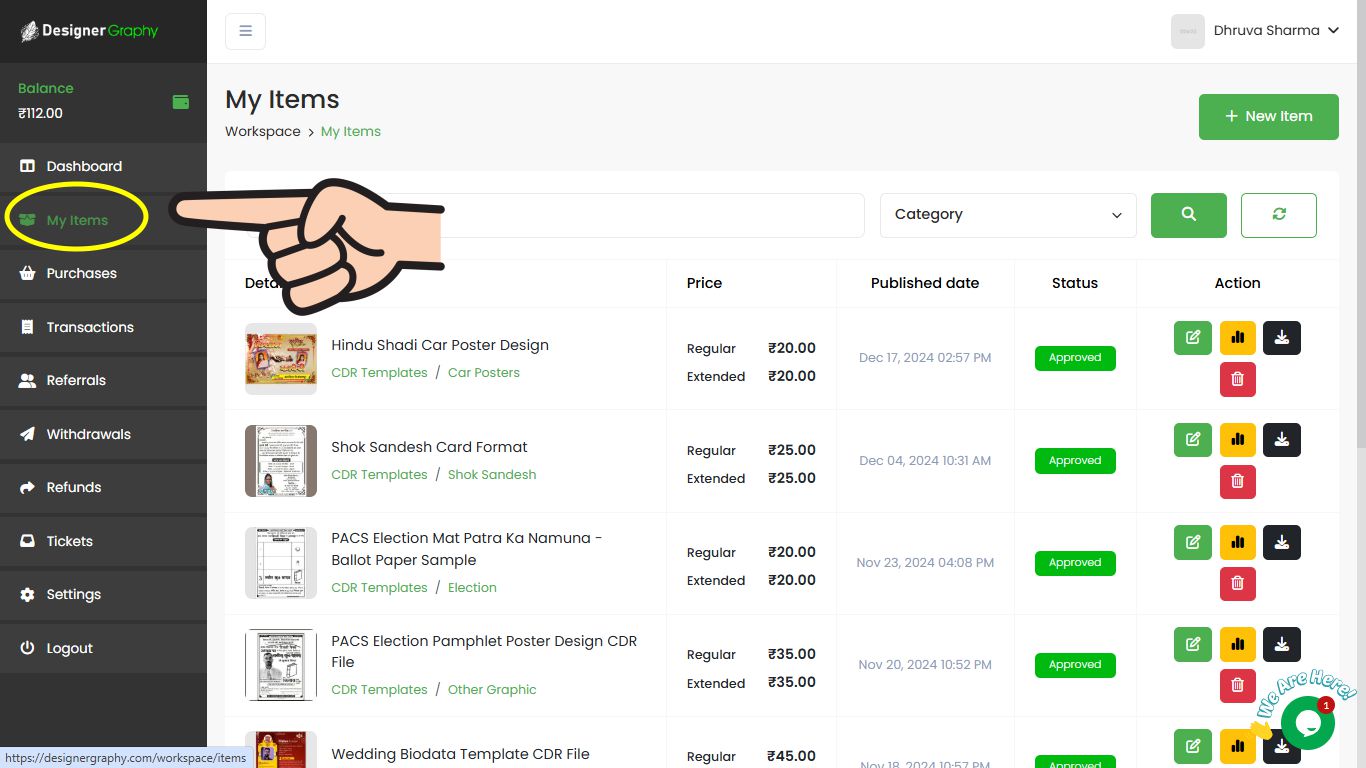
Step 2. Navigate to My Items
Goto My Items menu on left side. You will have all the items that you uploaded here. If the list is empty then its a right time to upload your first Digital product.
Step 3 Choose New Item button to upload a new design.

Step 4 Choose Category
Here you will need to specify the correct category. If you are about upload CDR File the then Choose CDR Templates or if you are willing to upload PSD files that are compatible in Photoshop then choose PSD Files. You are required to choose correct category as per your Project.
Here I am taking example of CDR File so I am choosing CDR template and Press Continue button.

Step 5 Name and Description

Here you are required to fill the name of your product. It is totally depends on you to name it but make it Product related.
You are required to fill the details about your product. The details should not be very short it should be good enough to describe your product. Do not copy text from any website otherwise you will not rank and you may face very less views on your product. Make it descriptive and unique content and never copy - paste.
Step 6 Category and Attributes

Make your product more specific by choosing SubCategory. Also Specify the minimum supported version of the required software.
Choose COLOR MODE of your project that can either be RGB or CMYK. Version is optional you can skip this. In Demo Link section keep it blank.
Now Tags : Write tags for your product as per your choice. For multiple tags separate them with coma(,).
Step 7 Files Section

The first one is (Drop Files to Upload). You will need to upload all those files that you have prepared to upload. You will be uploading ZIP file, Thumbnail(120x120), Preview Image (1200x610), Screen Shots (Any Size). After uploading these files you can proceed further.
Thumbnail : Choose that Smallest image (120px by 120).
Preview Image : Choose the Showcase Image that has size of 1200px By 610px.
Main File : Here you will choose the ZIP file. (The zip fie should contain Editable project and necessary fonts. It should not have useless JPEG or PDF. You need to provide only useful data inside zip file.)
ScreenShots : You can choose images for screenshot. You can choose multiple images. (Here we don't have special requirement for the dimension.)
Step 8 Licenses Price

We are not offering any extra services for Extended lisence So, Keep bth prices same.
Step 9 Free Item
Keep it "NO" for paid items. If you are giving that item for free then you can choose "YES".
Step 10 Message to the Reviewer
If you want to say anything to our Reviewer team then you can type your message on there.

Now the Final and most Important Step is to click on SUBMIT button.
Congratulatons! you have published your design and your now on journey to Work From Home. Our, Reviewer tema will check your file and then your product will go live.
If you are facing any Issues with upload process then you can request help. Goto Tickets in your dashboard and press [+] button to raise a new ticket.
Comments (0)